TOOLS
For best results, the recommended method for installation is wet application. Wetting your fingers, frame and the decal allows for easy slip positioning allowing you to place the decal exactly where you want it. We also suggest using a warm soapy water solution as with added warmth the media will become conformable to the frame’s lines.
A domestic hair dryer (on the lowest setting) may prove handy to soften the media and help evaporate excess moisture. It is helpful particularly when installing the thicker standard gloss media. Simple curved areas and small shapes may not need extra warmth to go down well. Added warmth is not generally required for Premium thin or Ultra Matte film though can help speed up evaporation and adhesion at the edges.
The aim of careful application is to have no air or water bubbles trapped underneath the film for the best finish.
TOOLS
1. The supplied mini squeegee will assist in chasing bubbles and moisture from beneath the media as you stick it to the frame. Your will find your fingers also do a very good job at chasing bubbles and helping the film to sit down on the frame.
2. A container (or trigger sprayer) filled with warm water with a 5-10 drops of baby shampoo (Solution). Add a small drizzle of BABY SHAMPOO – say 8-10 drops/third of teaspoon – to create your application solution.
3. A spray bottle filled with Solution.
4. A hair dryer.
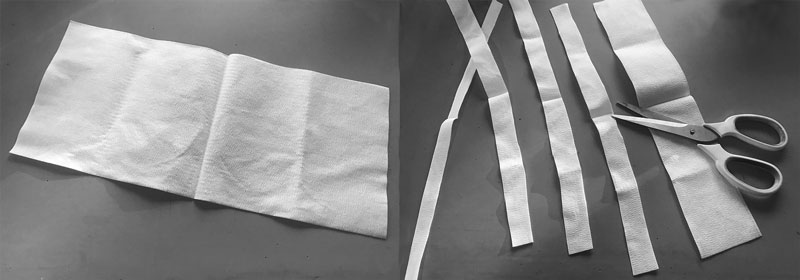
5. A couple of lint-free cloths. Wiping edges once film is down helps absorb excess moisture.
Cutting a second lint free cloth into thin strips is also advised as you can wrap these strips around sections of the frame that are sitting up a little more than you'd like. These strips act as extra fingers to help hold edges down while you continue to work. The cloth also absorbs moisture and accelerates adhesion at edges.
CLEAN YOUR FRAME AND PARTS
Make sure the frame is thoroughly clean and free of grease/oil/lint. We mean squeaky clean! Clean it twice to be sure. Make sure your hands are also very clean and do not touch the adhesive side unless your fingers are wet to avoid leaving fingerprints or contaminating adhesive surface. When cleaning the frame, pay particular attention to areas like the head tube, bottom bracket and drive side stays (anywhere grease and lubricant are used) as any residual grease and lubricant will affect adhesion.
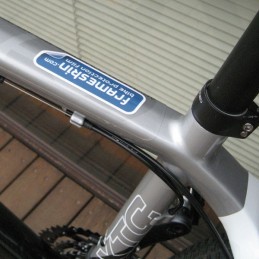
PIMP THE BRAND.
In the kit you will find a Frameskin logo sticker. Find a suitable spot on your frame and stick it right there. A reminder that your bike is wearing the ultimate in frame protection.
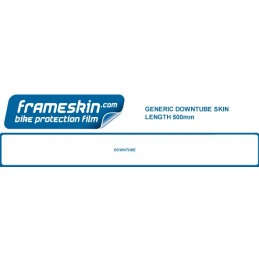
PARTS DIAGRAM
The parts diagram for the kit is labelled to be as descriptive as possible, but take your time to work out just where each piece goes as clear decals can be confusing at first glance. If you are uncertain which way up a particular decal goes ask us for advice.
ORDER OF INSTALLATION.
Unless otherwise indicated, there is no particular order of installation, however we do recommend that some parts be installed first as they often have other parts that align to them or come very close.
Apply the BACK OF SEAT TUBE and CENTRE DOWNTUBE decals first. Pay particular attention to getting these decals perfectly centred/positioned relative to the frame’s tubes. NOTE: Larger decals have notches at either end to indicate the centre line so use these for reference. Also, you can use other reference points like cable ports, clamp slots etc to guide placement of decals. Once these main decals are correctly positioned, aligning decals like the downtube side decals and the top tube decal is easier.
High end carbon bikes – the ones with unified rear triangles – have an extra degree of complication to them as there are a number of decals that need to key together (like the chainstay, seatstay and brace decals). In these cases, we advise applying these at the same time to ensure they are positioned correctly/optimally.
WET APPLICATION:
Spray a fine mist of SOLUTION onto the area of frame you are applying the decal to. wet your fingers, then peel the decal from its backing. Dip (or spray) the decal into the solution. Position the decal over the frame as accurately as possible to where you want it and from one end, use your fingers to press one end of the material onto the frame. Using the squeegee (and your fingers), walk the material down onto the frame making sure that it is following the line you have chosen and that no air bubbles are trapped underneath the surface. Work from the centre line of the decal outwards, use the squeegee or your fingers to expel any bubbles (of air or moisture) out to the edges. Use a hair dryer to dry off the areas of the decal that are not sitting down completely and to help the film conform to the frame. Note: Because the decal is wet, this can take a little while... so take your time (press your thumb on it) and do the best job you can. Let the decals dry off (at least a few hours or overnight). We recommend you inspect your job at this point to ensure that all the edges are sitting down (as any residual moisture will have evaporated off by now). You can press the edges down with your thumb.
REMOVAL OF DECALS: If you wish to remove or replace the decals at some point in the future, do not just yank them off. Doing so can remove clear coat or paint.
Warm the decal with a hair dryer as this softens the adhesive. Use your fingernail to lift an edge and very slowly walk/peel the decal off. Take care, and take your time. Note: Touch up paint under the decal may come off with the adhesive.
TAKE YOUR TIME
Installation time can vary due to the type and design of bike that each kit is custom-made for. The number of parts and in some cases the interaction of those parts can vary installation time also. User experience and temperament can also affect installation. It is important to take your time to read and understand the instructions and parts diagram. Find a clean well lit room to work in and do not rush the process.
Beer will not make this job any easier, but that’s no reason not to have a one.
Questions / Comments? email: sales@frameskin.com
DISCLAIMER: The techniques described here are intended as an overview of the vinyl manufacturers’s suggested installation and removal methods. No responsibility is implied or given for property damage, injury or any other liability resulting from the use of these methods, or the installation of decals on any surface. If you are not confident about applying the decals yourself, consult a professional vinyl signage installer for advice/assistance. These kits are designed and made by Frameskin and are not connected with any bicycle manufacturer.
DESIGN COPYRIGHT: All designs, kits, patterns and shapes are the intellectual property and copyright of Frameskin. No design, kit, pattern or shape may be reproduced, copied or duplicated under any circumstances (in part or whole). This would infringe our copyright and intellectual property and would make us angry. Our custom-shaped frame protection kits are highly crafted works of design and are sold as the premium standard and luxury level of protection for your bicycle. Our products surpass basic, standard and generic style protection products in every respect and are not available as a ‘factory’ option and not found as a standard item on a bicycle. Our products must not be confused with simple ‘utilitarian’ definitions of use or application. They are original and unique works. © 2018 Frameskin ALL RIGHTS RESERVED